
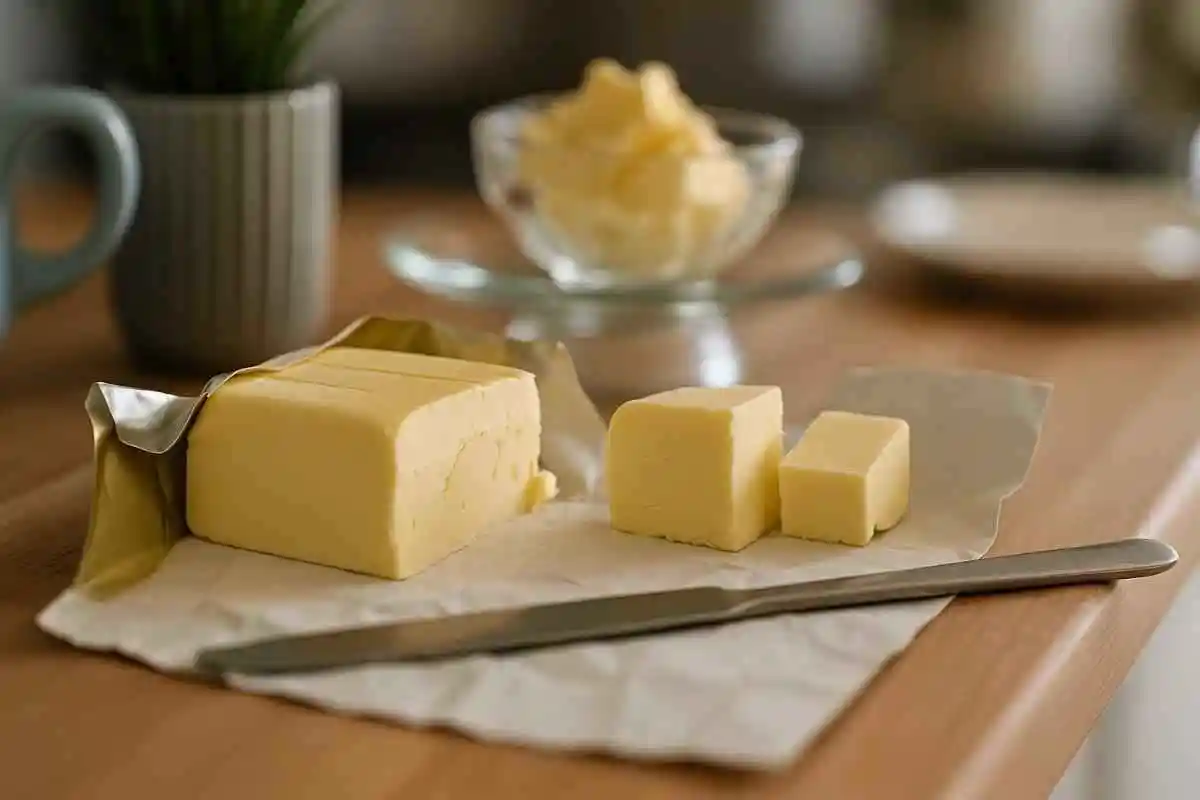
There’s nothing better than fresh butter, and sometimes I like to joke that homemade butter feels like BETTER BUTTER—richer, more personal, and far more satisfying than anything from a corner-store or supermarket dairy case. Unlike those uniform, pre-packaged sticks, this version connects me to the past, bringing to mind the bedtime stories my great-grandmother shared about growing up on a farm. I can still picture how she described those perfect sticks—little rectangles of solid gold—that could make even the simplest meals shine.
What I’ve discovered is that making BETTER BUTTER at home isn’t complicated at all. In fact, it’s a quick, playful process that brings a unique sense of culinary satisfaction. The best part is how effortlessly it comes together. From start to finish, it takes only about 10 minutes, and you can freeze portions to always have some on hand. Each batch is a chance to experiment with exciting flavors—lavender-honey, for instance, always makes my taste buds light up. Skipping the extra packaging of store-bought butter and refining my technique with every try keeps this recipe homemade, fresh, and full of the creamy, timeless deliciousness that makes every bite feel special.
From Whipping to Solid Better Butter
To make homemade BETTER BUTTER, I start with heavy whipping cream and sometimes a pinch of salt—optional, about 1/4 teaspoon per pint of cream. I pour the cream into a bowl suitable for a stand mixer or a medium mixing bowl if working by hand. Then, I beat it at medium speed (around #4–5 on a KitchenAid) until the cream reaches the right consistency. Over time, I’ve learned how each stage affects the final product, and watching the cream transform into BETTER BUTTER is both fun and rewarding.
There are three main stages: soft-whipped, hard-whipped, and finally, solid BETTER BUTTER. In the first two stages, the whey hasn’t fully separated, so the butter is sweeter than typical hard butter, though it may spoil sooner if not used quickly.
That’s never been a problem in my kitchen, as I usually remove a portion at each stage depending on what I need—sometimes just a small amount of whipped cream, sometimes a full pint of solid BETTER BUTTER. You can always continue whipping until you reach the stage you want, making the process flexible, enjoyable, and satisfying.
ADDING HERBS AND SPICES Better Butter
When I want to give Better Butter extra flavor, I usually start with whipped butter and carefully fold in fresh herbs, fragrant spices, or other flavorful additions, along with just a touch of salt to enhance the overall taste.
For more delicate ingredients, like roasted strawberries (because, honestly, YUM), I always wait until the butter has reached the perfect consistency before gently incorporating them. This careful timing ensures that the texture remains smooth, creamy, and easy to spread, while the flavors stay balanced and true to their natural character.
I enjoy taking my time to mix everything together thoroughly, making sure each bite carries the intended flavor. Once it’s ready, I store the flavored Better Butter in an airtight container. This keeps it fresh and perfectly spreadable for warm bread, muffins, or even as a finishing touch on pancakes, scones, or roasted vegetables. The process is simple, enjoyable, and a wonderful way to make homemade butter feel truly special.
For solid Better Butter, the process is just as enjoyable and rewarding. Sometimes I choose to keep the separated buttermilk plain for another use, so I wait to add any flavors until the butter has been fully strained from the liquid.
Once it’s ready, I simply mix it with a fork or spatula, carefully folding in herbs, spices, or other ingredients so that everything blends evenly without compromising the smooth texture.
The end result is a rich, creamy spread that carries the natural richness of butter while also taking on layers of added character—whether that’s the earthy aroma of fresh herbs, the sweet pop of roasted fruit, or a subtle hint of spice. Making solid Better Butter this way turns a simple ingredient into something truly special, perfect for spreading on bread, scones, or even adding a flavorful touch to cooked dishes.
Light and Fluffy Perfection
When I whip cream for about nine minutes, it transforms into something truly special—almost like the stiff whipped cream some restaurants serve with pancakes, but richer and more indulgent as homemade Better Butter.
The result is sweet, airy, and fluffy, making it perfect for spreading on warm muffins, freshly baked banana bread, or even scones straight from the oven. Whether enjoyed cold from the fridge or at room temperature, it spreads easily without tearing delicate baked goods, providing a luxurious, creamy experience with every bite.
I usually add a pinch of salt around the eight-minute mark to enhance the flavor, then continue mixing until the texture is perfectly smooth. Once ready, I store it in an airtight container, where this homemade Better Butter stays fresh and ready to enjoy for one to two weeks. This makes it a convenient and delicious addition to any meal.
What excites me most about homemade BETTER BUTTER are the flavor twists you can create. I often suggest additions like bright orange zest, roasted strawberries, or fragrant vanilla bean to introduce variety and elevate the butter beyond its natural richness.
Even after freezing, the texture changes only slightly. Though it may become a bit grainy since BETTER BUTTER contains both solids and liquids, it still remains creamy and indulgent. To preserve the best flavor and texture, I like to freeze small portions in a freezer-proof container, ensuring that every scoop maintains its freshness and deliciousness for up to three months.
This way, I always have ready-to-use, flavorful BETTER BUTTER on hand for spreading on bread, muffins, or even using in recipes.
A Buttery-Slick Stage BETTER BUTTER
When I whip cream for about nine and a half minutes, the fat is just beginning to separate, creating a slightly firmer texture with a smooth, buttery-slick mouthfeel—this is the stage where homemade BETTER BUTTER starts to shine.
It’s still soft enough to spread easily at room temperature, but once chilled, it becomes firmer than the soft-whipped stage, making it ideal for hearty, crusty breads. I usually add a pinch of salt around the eight-minute mark, then continue mixing until the texture and flavor reach perfect balance.
Once ready, I store the batch in an airtight container, where this homemade BETTER BUTTER stays fresh and creamy for one to two weeks, ready to enjoy whenever I need it.
One thing I love most about homemade BETTER BUTTER is experimenting with flavors. Variations like lavender-honey, warm cinnamon, or even a hint of garlic powder can completely transform its character, adding a new layer of depth to each batch.
Even after freezing, I’ve observed that the texture remains remarkably stable—especially when stored in a freezer-proof container. For the best quality and flavor, I like to freeze smaller portions and use them within three months, ensuring that every slice of bread, muffin, or pastry I prepare is enhanced by the creamy, delicious consistency of homemade BETTER BUTTER.
The Firm and Flavorful Stage BETTER BUTTER
When I whip cream for about nine and a half minutes, the fat begins its transformation, creating a slightly firmer texture—this is the stage where homemade BETTER BUTTER starts to take shape.
At this point, it develops a unique buttery-slick mouthfeel that is still soft enough to spread easily but firmer than the soft-whipped stage. I find it perfect for spreading at room temperature, yet when chilled, it pairs wonderfully with hearty, crusty breads.
I usually add a pinch of salt around the eight-minute mark, then continue mixing until the texture and flavor reach stability. Once ready, I store the BETTER BUTTER in an airtight container, where it stays fresh and creamy for one to two weeks, ready to enjoy whenever I need it.
Experimenting with flavors makes this stage of homemade BETTER BUTTER even more enjoyable. I’ve tried combinations like lavender-honey, cinnamon, and even a touch of garlic powder to give the butter new depth and character.
Even after freezing, the quality remains excellent, especially when stored in a freezer-proof container. To preserve the best flavor and texture, I freeze smaller portions and use them within three months. This approach ensures that every portion of BETTER BUTTER stays rich, creamy, and full of flavor, ready to enjoy whenever it’s needed.
Simple Timing for BETTER BUTTER
When it comes to making BETTER BUTTER, the whipping process often feels like the most crucial step. The times listed in most recipes are only approximate, as results can vary depending on the equipment you use. I’ve noticed that my stand mixer behaves differently from a hand whisk, so I treat the instructions as a guideline rather than a strict rule.
What truly matters is learning to recognize each stage of the process by observing the texture and consistency of the finished BETTER BUTTER.
I always rely on sight and personal taste to know when the BETTER BUTTER is ready. For instance, if it looks smooth, creamy, and spreads easily, I know I’ve reached the perfect stage.
This balance of technique and intuition is what makes making homemade butter so enjoyable. Rather than stressing over strict timing, I focus on creating something fresh, flavorful, and tailored to my own preferences, ensuring that every batch of BETTER BUTTER is as satisfying as it is delicious.


Leave a Reply